
How to Choose the Right Marine Switch Panel for Your Boat
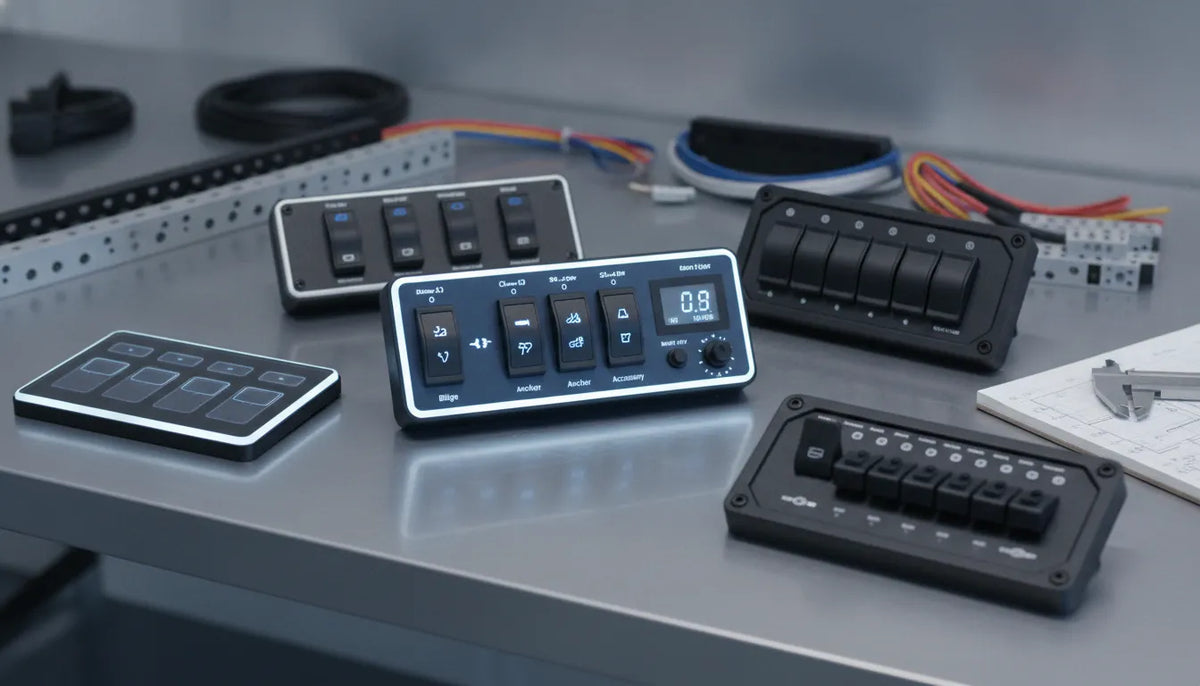
Lights, pumps, and electronics all need reliable power, but controlling them from a crowded or poorly labeled panel can make simple tasks harder. A well-chosen marine switch panel brings key controls together and helps you identify each circuit quickly. To find the right fit, consider the number of switches, the panel’s voltage and current ratings, and whether its design suits the installation location. You’ll also want to plan wiring, circuit protection, and access for future service. This guide explains what to compare, how to avoid common installation mistakes, and when to bring in a qualified marine electrician.
Key Takeaways
- Plan circuits before choosing a panel: List the equipment to control, its electrical requirements, and likely future additions.
- Select compatible marine components: Match the panel, wiring, and circuit protection to your boat’s system and each connected load.
- Make safety and serviceability priorities: Mount the panel in an accessible, protected location, label and secure connections, and ask a qualified marine electrician to review complex or uncertain work.
What Does a Marine Switch Panel Control?
A marine switch panel puts controls for multiple electrical circuits in one accessible place. It can make everyday tasks simpler, but the circuits it controls depend on your boat’s equipment and wiring. Before choosing a panel, list the systems you want to operate and check their electrical requirements.
Control Lights, Pumps, Electronics, and Other Circuits
A switch panel may control navigation and cabin lights, bilge pumps, livewells, fans, horns, and accessory circuits. Some panels also include features such as USB charging ports, voltmeters, indicator lights, or built-in circuit protection. The switches are often called gangs, so a six-gang panel, for example, has six switches for separate functions. This six-gang panel shows how multiple controls can be grouped together.
Plan each switch around a specific circuit, and label it clearly so you can identify its function at a glance. Keep in mind that some equipment, including marine electronics, may have its own power button even when its circuit is controlled by the panel. Bilge pumps may also need an automatic power path that remains active when the panel switch is off. Follow the pump manufacturer’s wiring instructions when planning that circuit.
Match Panel Voltage and Capacity to Your Boat’s Electrical System
Check your boat’s electrical system before selecting a panel. Many boats use 12-volt DC power, while others use 24-volt DC. Choose a panel rated for the system it will serve. AC circuits require components rated for AC, so don’t assume a DC panel can control them.
Also check the panel’s current rating, the rating of each switch, and the limits of its bus and circuit protection. These must suit the connected equipment and wiring. Review the specifications for each light, pump, or accessory, especially if you’re adding circuits to an existing system. Apollo Lighting carries marine electrical components and lighting for boat projects and upkeep. If you’re unsure whether a panel fits your system, ask a qualified marine electrician to review the plan before installation.
Which Marine Switch Styles and Features Should You Compare?
A switch panel should make onboard controls clear and comfortable to use, whether you’re at the helm in daylight or checking a circuit after dark. Compare the switch action, visibility, labels, and panel layout. The best fit depends on the equipment you’re controlling and where you’ll install the panel.
Compare Rocker, Toggle, and Push-Button Switches
Rocker switches operate with a simple press and sit relatively flush with the panel. Many rocker panels combine switches with features such as LED backlighting, USB charging ports, or a digital voltmeter, making them a flexible option for a compact helm.
Toggle switches offer a more traditional mechanical feel, and their position can make it easy to see whether a circuit is on or off. Some panels include rubber boot covers to help protect switches from water and dust. Push-button switches have a low-profile design, but check how each button works: a momentary button returns to its original position when released, while a maintained button stays engaged. Choose the action that suits the connected equipment. Explore Apollo Lighting’s marine equipment when comparing components for your boat project.
Compare Backlighting, Labels, Indicators, and Ease of Use
Backlighting helps you find controls in low-light conditions, while an LED indicator can show when a circuit is active. Check that indicators are easy to see from your normal operating position, but not distracting at night. Clear labels are just as important, especially when a panel controls several lights, pumps, or electronics.
Pre-printed labels identify common functions, while customizable labels give you more flexibility for a specific setup. Make sure each label matches the equipment connected to that switch, and keep the panel layout consistent. The Five Oceans toggle panel includes labels and LED indicators. If you’re deciding between individual switches and a ready-made panel, Eddie Marine’s switch selection includes both options.
How Do You Choose the Right Marine Switch Panel?
Choose a Gang Count for Current and Future Circuits
Start by listing the equipment you want to control, such as navigation lights, a bilge pump, chartplotter, and other accessories. Each independently controlled circuit generally needs its own switch, so compare your list with the panel’s gang count. Leave space for likely additions, too. A panel with no spare switches can make future upgrades more complicated.
Check what comes with the panel before you buy. Some models include switches and circuit protection, while others require you to choose those components separately. A switch-panel installation walkthrough can help you see how switch count relates to the circuits on a boat. If you’re unsure what your project requires, list each device and its electrical specifications, then confirm the panel is compatible with your boat’s system.
Check Dimensions, Mounting, Customization, and Price
Measure the space at the helm or installation site, then compare it with the panel’s dimensions and required cutout size. Check how it mounts and make sure there’s enough room behind it for wiring. You’ll also want to reach each switch easily and retain access to the console for maintenance.
Consider the panel’s exposure to water and spray. For exposed locations, look for a suitable ingress protection rating, such as IP65, IP66, or IP67, and follow the manufacturer’s installation guidance. Some panels offer choices for layout, labels, or finishes. Compare the total project cost, including any separately purchased breakers, wiring, connectors, and customization. This marine electronics installation advice can help you plan for fit and installation needs.
Compare Serviceability and Long-Term Value
Choose a panel that you can inspect and maintain without removing nearby equipment. Check whether terminals are accessible and whether individual switches or breakers can be replaced. Leave room behind the panel to work, and label each circuit clearly so you or a marine technician can trace connections during future repairs.
Look beyond the initial price. Durable components and accessible wiring can save time when you need to troubleshoot or add equipment. Plan to use marine-grade wire and connectors suited to the installation, and protect connections from moisture and corrosion. This marine wiring guide explains why careful layout can make future service easier. For a project that includes lighting or other electrical equipment, Apollo Lighting offers marine products and project-focused guidance.
How Does a Marine Switch Panel Resist Weather?
A marine switch panel handles weather through protective design, durable materials, and proper installation. Salt spray, humidity, sunlight, and washdown water can still damage a panel or its wiring, so check the product specifications and consider where you’ll mount it.
Check Water-Resistance Ratings, Seals, and Gaskets
Look for a published water-resistance rating, such as an IP rating, and check which parts of the panel it covers. The rating may apply to the front face but not the rear terminals, wiring, or mounting cutout. Follow the manufacturer’s instructions for the gasket, seals, and mounting orientation. Replace damaged or compressed gaskets, and don’t assume extra sealant will compensate for a poor fit.
Protect connections behind the panel as well. Use marine-grade connectors and sealed cable glands where appropriate, and keep terminals clear of standing water. These steps help limit moisture intrusion, corrosion, and electrical faults. This guide to common marine wiring mistakes offers more advice on protecting boat wiring.
Choose Corrosion-Resistant Materials and UV-Resistant Finishes
Salt and humidity can corrode metal, while prolonged sun exposure can fade or weaken some plastics. Check that the panel housing, terminals, fasteners, and wiring are designed for marine use. For wiring, marine-grade tinned copper is a better choice than automotive wire because its coating helps resist corrosion in damp, salty conditions. This guide to boat lighting and switch-panel wiring explains why wire selection matters.
Look for a finish and labels designed to withstand UV exposure, especially if the panel will sit in an open cockpit. Clear, durable labels make switches easier to identify and use. Choose materials based on the conditions they’ll face, not appearance alone.
Consider Panel Location, Spray, and Access
A water-resistant panel will last longer when it’s mounted in a sheltered spot. Place it within easy reach of the operator, often near the helm, but away from direct spray, washdown water, and runoff. Leave enough room behind the panel to route cables neatly and inspect or service connections without pulling on the wiring.
Follow the installation instructions so the gasket sits correctly and the cutout is sealed as specified. Avoid locations where water can pool around the panel or drain behind it. These switch panel placement tips can help you balance access and protection. For help finding marine lighting and electrical components for your project, contact Apollo Lighting.
How Should a Marine Switch Panel Protect Circuits?
A marine switch panel should do more than turn equipment on and off. Its fuses or breakers help protect wiring from excessive current caused by an overload or short circuit. Choose protection for each circuit based on the wiring, connected equipment, and panel specifications, rather than relying on the panel’s overall capacity.
Compare Fuses and Circuit Breakers
Fuses and circuit breakers both interrupt current when a circuit draws too much. A fuse must be replaced after it blows, while a breaker can usually be reset after you identify and fix the problem. Breakers can be convenient for equipment you use often, but either type must be rated for the circuit and suitable for marine use.
Some panels include fuses or push-to-reset breakers. Check the panel specifications to confirm the type and rating, then compare them with the requirements of the equipment you plan to connect. For example, the Five Oceans switch panel lists its built-in circuit protection, which can help you compare panel features.
Protect Each Circuit and Size Protection for the Wire and Load
Each branch circuit needs protection suited to the wire and connected equipment. The fuse or breaker must not allow more current than the wire can safely carry. Before choosing a rating, check the equipment instructions, wire size, circuit length, and panel specifications. If a fuse keeps blowing, don’t replace it with one rated for more current. Find and correct the cause instead.
Use marine-grade, tinned copper wire and connectors designed for a boat’s damp, salty conditions. Automotive wire may corrode in a marine environment, creating poor connections and eventual failures. This boat wiring guide explains why suitable wire matters when installing lights and switch panels.
Protect Each Circuit Near Its Power Source
Place overcurrent protection close to the power source so the wire is protected along its length. For example, if a fault occurs in an unprotected section between a battery and a distant fuse, that wire could overheat. Follow the panel and equipment instructions, along with applicable marine electrical standards, to determine the correct placement and installation.
Keep fuses and breakers accessible for inspection and service. A dedicated ground wire returning to a bus bar supports reliable operation, but grounding does not replace overcurrent protection. For help selecting compatible marine electrical components, consult a marine equipment specialist, especially for a complex installation.
How Do You Install and Wire a Marine Switch Panel Safely?
A safe installation starts with a clear plan, the right materials, and power fully disconnected. Check the panel and accessory instructions before you begin, and follow applicable marine electrical standards. If you’re unsure about wire sizing, circuit protection, or your boat’s existing wiring, have a qualified marine electrician review the work.
Plan the Layout and Disconnect Power Before Installation
Choose a location where you can reach and read the panel easily, while keeping it away from heavy spray, heat, and moving parts. Before cutting an opening, inspect the space behind the mounting surface for wiring, hoses, and structural supports. Sketch the panel layout and map each circuit, leaving enough room to reach connections for future repairs. Planning the wiring layout can help you avoid a crowded installation.
Disconnect the battery and other power sources, such as shore power, solar charging, or an inverter, following the boat and equipment manufacturers’ instructions. Use a meter to confirm the circuits are de-energized before touching the wiring. Turning a switch off does not necessarily make its wiring safe to handle.
Use Properly Sized Marine-Grade Wire and Connectors
Use marine-grade, tinned copper wire, not automotive wire. Tinned copper is designed to resist corrosion in damp, salty conditions. Size each wire for the circuit’s current draw and the full length of its run, including the return path. Check the panel and accessory specifications, as well as applicable marine electrical standards. If you’re unsure about the correct size, ask a marine electrician before installation.
Choose connectors made for marine use, such as properly crimped terminals with adhesive-lined heat shrink. Use the right crimping tool, then check that each connection is secure before sealing it. Apollo Lighting offers a range of marine electrical components for boat projects and upkeep.
Run Dedicated Grounds and Protect Wires From Chafing
Run a dedicated negative wire from each circuit to the boat’s negative bus bar. Don’t use the hull as a ground. A dedicated return path supports reliable operation and makes it easier to track down electrical problems. Follow your boat and equipment manufacturers’ grounding instructions, especially if the boat has an aluminum hull or a bonding system that requires specific care.
Route wires away from sharp edges, hot surfaces, and moving components. Use a grommet or suitable protective fitting where wiring passes through a bulkhead. Secure runs with marine-appropriate clamps or mounts to limit movement and prevent chafing from vibration. The marine wiring guide covers grounding and wire-routing practices in more detail.
Secure and Label Connections, and Leave Service Access
Secure wires so vibration and movement won’t loosen connections or pull on switch terminals. Avoid tight bends that can strain the conductors, and leave enough slack to service the panel without putting tension on the wiring. Keep terminals and other connections accessible for inspection. Avoid burying them behind the panel or bundling wires so tightly that you can’t trace individual circuits.
Label both ends of every wire, and identify each circuit on the panel. Clear labels make it easier to troubleshoot a light, pump, or other accessory later. Before closing the installation, compare each connection with your wiring plan and confirm that every wire reaches the intended terminal. A tidy, labeled setup saves time when maintenance or repairs are needed.
Seal Cutouts and Test Circuits Before Restoring Power
After fitting the panel, seal the cutout and cable openings with products suitable for the location and materials. Use the appropriate gasket or cable gland to help keep moisture out, and protect connections with marine-rated terminals and heat-shrink insulation. Check that the seal does not interfere with the panel’s fit or operation.
Before restoring power, inspect the wiring and confirm that each connection is secure and correctly placed. Verify that circuit protection is appropriate for the wire and connected load. Restore power according to the equipment instructions, then test circuits one at a time. Watch for flickering, unexpected heat, unusual sounds, or a breaker that trips. If anything seems wrong, disconnect power and investigate rather than repeatedly resetting the breaker. When in doubt, ask a qualified marine electrician to check the installation.
Which Marine Switch Panel Installation Mistakes Should You Avoid?
A reliable marine switch panel depends on more than the panel itself. Incorrect wire sizing, poor connections, and inadequate circuit protection can cause equipment problems or create safety risks. Before restoring power, review the wiring plan, check every connection, and confirm that the panel and its circuits suit the boat’s electrical system.
Avoid Undersized Wire and Overloaded Circuits
Wire must be sized for the circuit’s current, wire run length, and installation conditions. Undersized wire can overheat or cause voltage drop, which may make lights appear dim or equipment operate unpredictably. Avoid adding accessories without checking the panel’s capacity and the rating of the supply circuit. Each circuit also needs appropriate overcurrent protection, selected to protect the wire and connected equipment.
Use marine-grade, tinned copper wire and connectors designed for damp, corrosive conditions. Automotive wire may not provide the durability a marine installation needs. The boat wiring guide explains why material selection and proper circuit sizing matter. Follow equipment manufacturers’ instructions and applicable marine standards, and ask a qualified professional if you’re uncertain about load calculations.
Don’t Ground Through the Hull or Leave Connections Exposed
Don’t rely on the hull as a circuit’s ground path. Run dedicated negative wires to the appropriate bus or grounding point, following the boat and equipment manufacturers’ guidance. On aluminum boats, oxidation can interfere with electrical contact, and a dedicated return path makes connections easier to inspect and troubleshoot.
Protect terminals from spray, condensation, and accidental contact. Use marine-rated connectors and suitable insulation, such as adhesive-lined heat-shrink where appropriate. Keep connections out of places where water can collect, and use protective covers or enclosures when needed. The marine wiring guide discusses dedicated grounding as an alternative to using an aluminum hull. Inspect existing wiring for corrosion or damaged insulation before connecting it to a new panel.
Label Connections, Add Strain Relief, and Check Your Work
Label each wire at both ends so you can identify circuits during repairs or future upgrades. Plan wire runs before mounting the panel, leaving enough slack to reach terminals without pulling on them. Secure cables with suitable clamps or ties, and add strain relief where wires enter the panel. Keep connections accessible for inspection while protecting wires from sharp edges, heat, and moving parts.
Before powering the system, compare the finished wiring with your diagram. Check that terminals are secure, insulation is intact, and each circuit has the correct protection. Test circuits one at a time and watch for dim lights, unusual heat, or a breaker that trips repeatedly. This marine wiring checklist can help you catch common layout and connection issues before putting the panel into service.
Call a Qualified Marine Electrician When Needed
If you can’t confirm the right wire size, circuit protection, or grounding method, don’t guess. A qualified marine electrician can assess the installation, especially if you’re modifying the main distribution system, working with high-current equipment, or troubleshooting repeated breaker trips, hot wires, or corrosion. These symptoms may point to problems beyond the switch panel.
Before asking for help, gather the panel and equipment specifications, a list of connected loads, and any wiring diagrams you have. This information can help the electrician assess the work and explain what needs attention. For project-focused guidance on marine lighting and electrical components, contact Apollo Lighting. Its team serves boat owners and marine professionals with more than 30 years of marine experience.
Frequently Asked Questions
How many switches should a marine switch panel have?
Count the circuits you want to control independently, then choose a panel with enough switches for those circuits and a few likely additions. Check whether the panel includes switches and circuit protection or requires you to purchase them separately.
Can one marine switch panel control both 12-volt and 24-volt equipment?
Only if the panel and its components are rated for the systems involved. Check the panel specifications and each device’s requirements before connecting anything. AC equipment needs components rated for AC, not a DC panel.
Should a bilge pump be connected to a switch panel?
A panel switch can provide manual control, but many bilge pumps also need an automatic power path that works when the switch is off. Follow the pump manufacturer’s wiring instructions, and ask a marine electrician if you’re unsure how to protect automatic operation.
What circuit protection does a marine switch panel need?
Each circuit needs a fuse or breaker suited to its wiring and connected equipment. Protection should be selected to keep the wire within its safe current limit and placed close to the power source. Don’t install a higher-rated fuse to stop repeated blowouts; find the cause of the problem instead.
Can I install a marine switch panel myself?
You can take on the work if you understand the boat’s electrical system and can follow the panel and equipment instructions, along with applicable marine standards. Disconnect all power sources and verify the wiring before testing. If you’re uncertain about wire sizing, grounding, or circuit protection, have a qualified marine electrician review the installation.